Turtles are not known to thrive in captivity; the same can be said for other reptiles as they tend to do better when left to their own devices in the wild. This is especially true when you consider their breeding tendencies. Feral turtles breed easier than caged ones. However, those that love the reptile and feel up to the challenge of breeding them can check out the guidelines in this piece on how to breed turtles.
Table of Contents
Getting the turtles for breeding
There are steps to adhere to if you really want to know how to breed turtles. Without, following the stipulated guidelines, you might not like the result of your effort in the end. Thus, we strongly advise you to take the required steps to achieve good results.
Get both female and male turtles
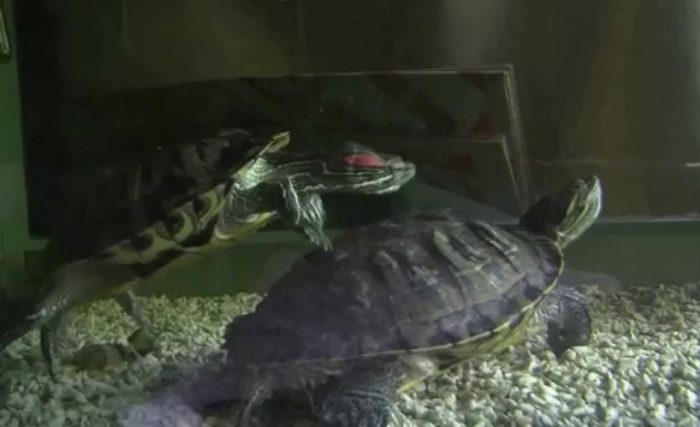
Surely, there would be no breeding without both genders coming together. The males can be differentiated from the females by their more colorful and outgoing nature, in addition to a concave or flat plastron, while the larger females spot a convex or flat plastron (bottom shell), which allows room for eggs. The same can be said for the water turtles that have males in smaller sizes with their forelimbs displaying long claws. Among the box turtles, the male’s tail is fatter with their cloaca or vent further from their shells than that of the females.
Ensure they are sexually mature
Turtles must get to a sexually mature age before they can breed; at least three years for male water turtles and five years for their female counterpart. Box turtles need to attain five years old before either of the sexes can breed.
Cool the turtles
Your caged turtles must be cooled to increase their chances of breeding. As their nesting season runs from March to June, the best cooling period for the box turtles should be December to February, and January to February for water turtles. Box turtles and water turtles should be kept at a temperature of 50 to 60 degrees Fahrenheit; 8 to 12 weeks for box turtles, and 6 to 8 weeks for the water turtles.
The turtles can be left to their own devices during this period, food can be provided, but they may not eat many. Turtles that are reared in outdoor ponds can take advantage of the cold winter to go into hibernation. However, their habitat must be returned to the regular temperature at the end of the cooling period.
Provide the proper nutrition for the occasion
Feed the turtles well as their breeding season approaches, the female’s food should be replete with vitamin D and calcium, in addition to their normal diet. For your water turtle, you can feed combinations of snails, earthworms, melon, butter lettuce, strawberries, bananas, vegetable scraps, blueberries, tomatoes, peas, dandelion flowers, mulberry leaves, and cooked sweet potatoes. The same can be fed to the box turtles, in addition to crickets, feeder goldfish, boiled egg, kale, chopped and steamed broccoli, corn on the cob, and plenty of green leafy vegetables.
The need for calcium can be met by feeding them cuttle fishbone or calcium supplements since they are exposed to the sun, outdoor turtles don’t need extra Vitamin D3, but the indoor turtle will need a D3 supplement, or a full spectrum reptile light must be made available.
Create the most favorable breeding condition
When you must have prepped the turtles for the breeding process to commence, some work must also be done in their surroundings and placement at this time. Follow the guidelines below for further clarification on how to breed turtles.
Give the reptiles space
You can’t do much to facilitate matting among the turtles, just bring the ones that are sexually mature together and allow nature to take its course. Space is of utmost importance so that the reptiles can move freely, and nesting areas should be provided for the females to lay eggs.
Balance the female to male ratio
It is favorable to have more females than males, since the health of the females may suffer, as the sexually motivated males make too much demand on them. The males may even battle amongst themselves for a female. Also, get the males out at the end of the mating season, or they will continue to disturb the females.
Create nesting areas
Nesting areas should have slightly moist soft soil (6 to 12 inches) and shelter. Logs and rocks should be made available so that the females can hide their eggs after laying. Water turtles are known to lay eggs in clutches of two to ten eggs, a clutch can take a day or two, and weeks may pass between clutches.
How To Take Care of the Turtle Eggs
Once the eggs have landed, there are actions that need to be taken to ensure they are safe. Failure to take care of them the right way can be fatal. Thus, take note of the listed facts.
Incubation
An inexpensive incubator can be purchased to house the eggs; monitor the temperature through the attached thermometer or an external one. In the absence of an incubator, your regular room temperature in the summertime can hatch the eggs. Relocate the eggs to cooler spots on scorching hot days and ensure that they are moist. Avoid direct exposure to the sun to prevent overheating.
Create a nest
You can DIY with a discarded container and some paraphernalia from your garden store supply. Punch some air holes into the lid of a sturdy container; ensure that the lid is not hard to open to avoid jarring the incubating eggs as you conduct regular checks. The eggs go inside and the lid is set lightly on the container. As the hatching time approaches, the lid should be tightened enough to secure the hatchlings.
Lids on containers prevent the heat source from the incubator from overheating the eggs. Nestling material can be made with one part peat moss, one part vermiculite, and one part sphagnum moss. Squeeze out any excess water after soaking them and add to the container.
Once the eggs are laid, don’t turn them as you pick them up to avoid killing the embryo. Gently place them in small depressions made in the vermiculite mixture. Cap the container with the temperature set at 75 to 85 degrees. You can avoid turning the eggs by marking the upside with a marker. Eggs that are stuck together should be separated gently or left like that if they are hard to separate.
Turtle sex determination
Contrary to popular belief, it is not genetic factors that determine sex in turtles; the credit goes to the temperature. Mostly, female turtles hatch from higher temperatures (85 degrees max), and lower temperatures will yield more males (75 degrees max). You can get an equal number of both females and males from 80 degrees. Temperature from 90 degrees and above will damage the eggs, killing the hatchlings in the process.
Checking the eggs
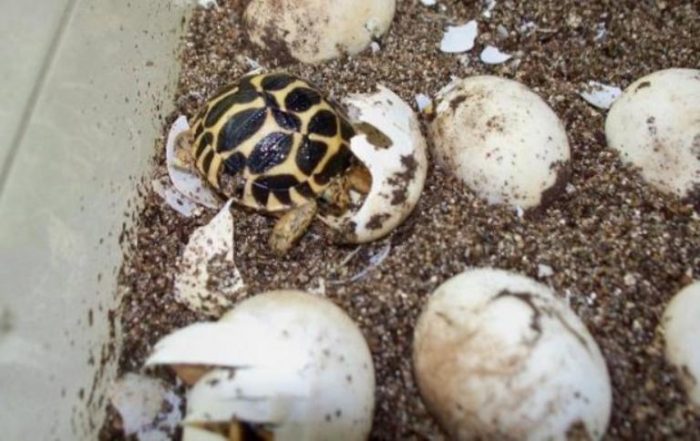
From 45 days and above, the eggs should be checked more frequently after you have been checking once weekly to ensure that they are not deteriorating, moldy, and moist enough. A healthy hatchling is expected to come forth on its own with the aid of its “egg tooth” which helps in breaking its shell open; thus, no need to help. If molds develop, don’t pick the egg up; just wipe it with the aid of a cotton swab. The hatching time for baby turtles is between 50 to 120 days, depending on the temperature they are exposed to.
Eliminate the bad eggs
The eggs that refused to hatch will have to be discarded after you have given them sufficient time to hatch. An egg with a dent may still be good, but there are eggs that may look fine on the surface but have leaked out from under. A collapsed egg is an indication of a bad egg. The eggs that remain after four to six months should be discarded.
Read Also; Details of the Differences Between a Turtle and Tortoise
Taking care of the hatchlings
Avoid contaminating the container for the eggs that are yet to hatch by discarding the empty shells. A hatchling may remain in the eggshell a few days after it breaks open; this is in a bid to absorb the remaining part of the egg yolk it has in its belly. Remove the hatchlings from the incubator and place them in another container lined with moist paper towels. They stay there for a few more days until they are done absorbing their yolk sack. In the end, get them over to a vivarium, and introduce them to their new home using a pan filled with shallow water.